1.实验目的2.论文详读3、实验原理
3.1基本思想3.2基本步骤3.3实现细节
3.3.1利用opencv中schaar计算能量图3.3.2使用动态规划查找最优 seam3.3.3 放大图像 4、实验环境
4.1 基本概要4.2 实验代码4.3 展示结果 5、结果展示6.程序设计和实现Github地址bilibili地址项目成果展示地址 1.实验目的
阅读Seam Carving for Content-Aware Image Resizing论文,使用python复现论文中的算法并加入到pygame模块中,使其成为一个可交互的兼顾展示过程的demo。
2.论文详读 这里从原文章出发,文章中介绍算法的部分从第三段开始
Figure 1: A seam is a connected path of low energy pixels in an image、On the left is the original image with one horizontal and one vertical seam、In the middle the energy function used in this example is shown (the magnitude of the gradient), along with the vertical and horizontal path maps used to calculate the seams、By automatically carving out seams to reduce image size, and inserting seams to extend it, we achieve content-aware resizing、The example on the top right shows our result of extending in one dimension and reducing in the other, compared to standard scaling on the bottom right
图1:接缝是图像中低能量像素的连通路径。左边是原始图像,有一个水平和一个垂直接缝。在中间显示了这个例子中使用的能量函数(梯度的大小),以及用于计算接缝的垂直和水平路径图。通过自动切割接缝来减少图像的大小,并插入接缝来扩展图像,我们实现了内容感知的大小调整。右上方的示例显示了我们在一个维度上扩展而在另一个维度上减小的结果,而右下方则是标准缩放的结果
3 The Operator
Our approach to content-aware resizing is to remove pixels in a ju- dicious manner、Therefor, the question is how to chose the pixels to be removed? Intuitively, our goal is to remove unnoticeable pixels that blend with their surroundings、This leads to the following sim- ple energy function that was used in many figures in this paper such as Figures 1, 6, 5, 8, 11, 12, 13 (we explore other energy functions in subsection 3.2):
我们的方法是内容感知的大小调整是删除像素在一个不利的方式。因此,问题是如何选择要删除的像素?直观地说,我们的目标是去除与周围环境混合的不明显的像素。这就产生了以下简单的能量函数,在本文的许多图中都使用了这个函数,如图1、6、5、8、11、12、13(我们在3.2小节中探索了其他的能量函数):
Given an energy function, assume we need to reduce the image width、One can think of several strategies to achieve this、For in- stance, an optimal strategy to preserve energy (i.e., keep pixels with high energy value) would be to remove the pixels with lowest en- ergy in ascending order、This destroys the rectangular shape of the image, because we may remove a different number of pixels from each row (see Figure 2(f))、If we want to prevent the image from breaking we can remove an equal number of low energy pixels from every row、This preserves the rectangular shape of the image but de- stroys the image content by creating a zigzag effect (Figure 2(e))、To preserve both the shape and the visual coherence of the image we can use Auto-cropping、That is, look for a sub-window, the size of the target image, that contains the highest energy (Figure 2(b))、Another possible strategy somewhat between removing pixels and cropping is to remove whole columns with the lowest energy、Still, artifacts might appear in the resulting image (Figure 2©)、There- fore, we need a resizing operator that will be less restrictive than cropping or column removal, but can preserve the image content better than single pixel removals、This leads to our strategy of seam carving (Figure 2(d)) and the definition of internal seams.
给定一个能量函数,假设我们需要减少图像宽度。人们可以想出几种策略来实现这一点。例如,保存能量的最佳策略(即保留高能量值的像素)是按升序去除能量最低的像素。这破坏了图像的矩形,因为我们可能从每一行删除不同数量的像素(参见图2(f))。如果我们想要防止图像被破坏,我们可以从每一行移除等量的低能量像素。这保留了图像的矩形形状,但通过创建锯齿效果破坏了图像的内容(图2(e))。为了保持图像的形状和视觉一致性,我们可以使用自动裁剪。也就是说,寻找包含最高能量的目标图像大小的子窗口(图2(b))。在删除像素和裁剪之间的另一个可能的策略是用最低的能量删除整个列。尽管如此,工件可能会出现在结果图像中(图2©)。因此,我们需要一个大小调整操作符,它比剪切或删除列限制少,但可以比删除单个像素更好地保存图像内容。这导致了我们的接缝雕刻策略(图2(d))和内部接缝的定义。
Formally, let I be an n × m image and define a vertical seam to be:
形式上,设I是一个n × m的图像,定义一个垂直接缝为:
where x is a mapping x : [1,…,n] → [1,…,m]、That is, a vertical seam is an 8-connected path of pixels in the image from top to bot- tom, containing one, and only one, pixel in each row of the image (see Figure 1)、Similarly, if y is a mapping y : [1, 、、、, m] → [1, 、、、, n], then a horizontal seam is:
其中x是一个映射x:[1,…n]→[1,…,m]。也就是说,垂直接缝是图像中像素从上到下的8个连接路径,每一行包含且仅包含一个像素(见图1)。类似地,如果y是一个映射y:[1,…[1, 、.], n],则水平接缝为:
The pixels of the path of seam s (e.g、vertical seam {si}) will therefore be Is=〖{I(s_i)}〗(i=1)n=〖{I(x(i),i)}}〗_(i=1)n、Note that similar to the removal of a row or column from an image, removing the pixels of a seam from an image has only a local effect: all the pixels of the image are shifted left (or up) to compensate for the missing path.
因此,接缝s(如垂直接缝{si})路径的像素为 Is=〖{I(s_i)}〗(i=1)n=〖{I(x(i),i)}}〗_(i=1)n.。请注意,与从图像中删除行或列类似,从图像中删除接缝的像素只会产生局部效果:图像中的所有像素都向左(或向上)移动,以补偿缺失的路径。
Figure 2: Results of 5 different strategies for reducing the width of an image、(a) the original image and its e1 energy function, (b) best cropping, © removing columns with minimal energy, (d) seam removal, (e) removal of the pixel with the least amount of energy in each row, and finally, (f) global removal of pixels with the lowest energy, regardless of their position、Figure 3 shows the energy preservation of each strategy.
图2:缩小图像宽度的5种不同策略的结果。(a)原始图像及其e1能量函数,(b)最佳裁剪,©去除能量最小的列,(d)去除接缝,(e)去除每一行能量最小的像素,最后(f)全局去除能量最低的像素,无论其位置如何。图3显示了每种策略的能量保存情况。
Figure 3: Image energy preservation、A comparison of the preser- vation of content measured by the average pixel energy using five different strategies of resizing、The actual images can be seen in Figure 2.
图3:图像能量保存。使用五种不同的调整策略,通过平均像素能量测量内容保存的比较。图2中显示了实际的图像。
The visual impact is noticeable only along the path of the seam, leaving the rest of the image intact、Note also that one can replace the constraint |x(i)−x(i−1)| ≤ 1 with |x(i)−x(i−1)| ≤ k, and get either a simple column (or row) for k = 0, a piecewise connected or even completely disconnected set of pixels for any value 1 ≤ k ≤ m.
Given an energy function e, we can define the cost of a seam as E(s)=E(Is)= ∑_(i=1)^n▒〖e(I(s_i ))〗、We look for the optimal seam s∗ that minimizes this seam cost :
视觉冲击只有沿着接缝的路径是显而易见的,而图像的其余部分是完整的。还请注意,一个可以替代约束| x(i)−x(i−1)|≤1 | x(i)−x(i−1)|≤k,并得到一个简单的列(或行)k = 0,分段连接甚至完全断开设置任何值的像素1≤k≤m。
在给定能量函数e的情况下,我们可以将煤层的成本定义为E(s)=E(Is)= ∑_(i=1)^n▒〖e(I(s_i ))〗.。我们寻找能使接缝成本最小化的最佳接缝s∗:
The optimal seam can be found using dynamic programming、The first step is to traverse the image from the second row to the last row and compute the cumulative minimum energy M for all possible connected seams for each entry (i, j):
利用动态规划方法可以找到最优接缝。第一步从第二行遍历图像到最后一行,计算每行(i, j)所有可能连通接缝的累计最小能量M:
M(i,j)=e(i,j)+min(M(i-1,j-1),M(i-1,j),M(i-1,j+1))
At the end of this process, the minimum value of the last row in M will indicate the end of the minimal connected vertical seam、Hence, in the second step we backtrack from this minimum entry on M to find the path of the optimal seam (see Figure 1)、The definition of M for horizontal seams is similar.
在这个过程的最后,M中最后一行的最小值将表示最小连通垂直缝的结束。因此,在第二步中,我们从M上的最小条目回溯到找到最优接缝的路径(见图1)。对于水平接缝,M的定义与此类似。
3.1 Energy Preservation Measure
To evaluate the effectiveness of the different strategies for content- aware resizing, we can examine the average energy of all of pixels in an image 1/(|I|) ∑_(p∈I)▒〖e§〗 during resizing、Randomly removing pixels should keep the average unchanged, but content-aware resizing should raise the average as it removes low energy pixels and keeps the high energy ones、Figure 3 shows a plot of the change in aver- age energy while changing the image width of Figure 2 using the five different strategies outlined above、As expected, removing the low energy pixels in ascending order gives the optimal result、This is closely followed by pixel removal、But both methods destroy the visual coherence of the image、Cropping shows the worst energy preservation、Column removal does a better job at preserving en- ergy, but still introduce visual artifacts、Seam carving strikes the best balance between the demands for energy preservation and vi- sual coherency、This graph results are characteristic to many images in general.
3.1减少能量方法
为了评估不同策略对内容感知大小调整的有效性,我们可以检查图像1/(|I|) ∑_(p∈I)▒〖e§〗在大小调整过程中所有像素的平均能量。随机删除像素应该保持平均像素不变,但内容感知的调整应该提高平均像素,因为它删除低能量像素,保持高能量像素。图3显示了使用上述五种不同策略改变图2的图像宽度时平均能量的变化。如预期的那样,按升序去除低能量的像素会得到最优的结果。这是紧随其后的像素去除。但这两种方法都破坏了图像的视觉一致性。收割表现为能量保存最差。柱移除在保存能量方面做得更好,但仍然会引入视觉伪影。接缝雕刻在节能和视觉一致性的要求之间达到了最好的平衡。一般来说,这个图的结果具有许多图像的特点。
3.2 Image Energy Functions
We have examined several possible image importance measures found in literature as the energy function to guide seam carving、We have tested both L1 and L2-norm of the gradient, saliency measure [Itti et al、1999], and Harris-corners measure [Harris and Stephens 1988]、We also used eye gaze measurement [DeCarlo and Santella 2002], and the output of face detectors.
Figure 4 compares the results of the e1 error, entropy, segmentation, and Histogram of Gradients (HoG)、The entropy energy computes the entropy over a 9×9 window and adds it to e1、The segmentation method first segments the image [Christoudias et al、2002] and then applies the e1 error norm on the results, effectively leaving only the edges between segments、Finally, eHoG is defined as follows:
3.2图像能量函数
我们研究了文献中发现的几种可能的图像重要性度量方法,作为指导缝刻的能量函数。我们测试了梯度的L1和l2范数、显著性测量[Itti等人1999]和Harris-corners测量[Harris和Stephens 1988]。我们还使用了眼睛凝视测量[DeCarlo和Santella 2002],以及面部探测器的输出。
图4比较了e1误差、熵、分割和梯度直方图(Histogram of Gradients, HoG)的结果。熵能通过9×9窗口计算熵并将其加到e1上。分割方法首先对图像进行分割[Christoudias et al、2002],然后对结果应用e1误差范数,有效地只留下片段之间的边缘。最后,eHoG定义如下:
Figure 5: Comparing aspect ratio change、From left to right in the bottom: the image resized using seam removals, scaling and cropping
图5:比较纵横比的变化。下图从左到右:通过移除接缝、缩放和裁剪来调整图片大小
where HoG(I(x,y)) is taken to be a histogram of oriented gradients at every pixel [Dalal and Triggs 2005]、We use an 8-bin histogram computed over a 11 × 11 window around the pixel、Thus, taking the maximum of the HoG at the denominator attracts the seams to edges in the image, while the numerator makes sure that the seam will run parallel to the edge and will not cross it、eHoG was also used in Figures 9 and 10.
As expected, no single energy function performs well across all images but in general they all accommodate a similar range for re- sizing、They vary in the rate at which they introduce visual artifacts and the parts of the image they affect、We found either e1 or eHoG to work quite well.
其中HoG(I(x,y))被认为是每个像素的有方向梯度直方图[Dalal和Triggs 2005]。我们使用像素周围的11 × 11窗口计算出的8 bin直方图。因此,取分母处HoG的最大值将接缝吸引到图像的边缘上,而分子则确保接缝与边缘平行,不会与边缘相交。图9和图10中也使用了eHoG。
正如预期的那样,没有一个单一的能量函数在所有图像上都表现得很好,但总的来说,它们都适应一个类似的大小调整范围。它们引入视觉伪影的速度以及它们影响的图像部分各不相同。我们发现e1或eHoG都工作得很好。
4 Discrete Image Resizing
4.1Discrete Image Resizing Aspect Ratio Change
Assume we want to change the aspect ratio of a given image I from
n×m to n×m′ where m−m′ = c、This can be achieved simply by successively removing c vertical seams from I、Contrary to simple scaling, this operation will not alter important parts of the image (as defined by the energy function), and in effect creates a non-uniform, content-aware resizing of the image (Figure 5).
The same aspect ratio correction, from n × m to n × m′ can also be achieved by increasing the number of rows by a factor of m/m′ (Figure 6)、The added value of such an approach is that it does not remove any information from the image、We discuss our strategy for increasing an image size in details in sub-section 4.3.
4离散图像调整大小
4.1离散图像大小变化的长宽比
假设我们想改变给定图像I的长宽比n×m n×m m−m = c。这可以通过先后删除c来实现垂直接缝从i与简单的扩展,该操作不会改变形象的重要部分(如能量函数定义的),而实际上创建了一个非均匀,content-aware调整图像的大小(图5)。
同样的宽高比校正,从n × m到n × m '也可以通过增加m/m '的行数来实现(图6)。这种方法的附加价值是它不会从图像中去除任何信息。我们在4.3小节详细讨论了增加图像大小的策略。
4.2 Retargeting with Optimal Seams-Order
Image retargeting generalizes aspect ratio change from one dimen- sion to two dimensions such that an image I of size n × m will be retargeted to size n′ × m′ and, for the time being, we assume that m′ < m and n′ < n、This begs the question of what is the correct order of seam carving? Remove vertical seams first? Horizontal seams first? Or alternate between the two? We define the search for the optimal order as an optimization of the following objective function:
4.2最优接缝顺序的再定位
形象重新定位目标概括纵横比变化从一维到二维的图像I大小将n×m大小n '×m ',就目前而言,我们认为m ’ < m和n ’ < n。这就引发了另一个问题:seam雕刻的正确顺序是什么?先拆垂直接缝?先水平缝吗?或者在两者之间交替?我们将搜索最优顺序定义为以下目标函数的优化:
where k=r+c, r=(m−m′),c=(n−n′)and αi is used as a parameter that determine if at step i we remove a horizontal or vertical seam:〖 α〗i∈{0,1},∑(i=1)^k▒〖α_i=r,〗 ∑_(i=1)^k▒〖〖(1-α〗i)=c 〗
其中,k=r+c, r=(m−m '),c=(n−n '), αi被用作参数,决定在第I步移除水平接缝还是垂直接缝: 〖 α〗i∈{0,1},∑(i=1)^k▒〖α_i=r,〗 ∑(i=1)^k▒〖〖(1-α〗i)=c 〗
We find the optimal order using a transport map T that specifies, for each desired target image size n′ × m′ , the cost of the optimal sequence of horizontal and vertical seam removal operations、That is, entry T(r,c) holds the minimal cost needed to obtain an image of size n − r × m − c、We compute T using dynamic programming、Starting at T(0, 0) = 0 we fill each entry (r, c) choosing the best of two options - either removing a horizontal seam from an image of size n−r×m−c+1 or removing a vertical seam from an image of size n−r+1×m−c:
我们使用传输映射T来找到最优顺序,该映射T指定了对于每个期望的目标图像尺寸n ’ × m ',水平和垂直接缝去除操作的最优序列的代价。也就是说,T(r,c)保存了获取大小为n - r × m - c的图像所需的最小代价。我们使用动态规划计算T。从T(0,0) = 0开始,我们从两个选项中选择最好的来填充每个条目(r, c)——要么从大小为n−r×m−c+1的图像中移除水平缝,要么从大小为n−r+1×m−c的图像中移除垂直缝:
T(r,c)=min〖((T(r-1,c)+E(s^x (I(n-r-1m-c) )),T(r,c-1)+E(s^y (I_(n-rm-c-1) ))〗)
where In−r×m−c denotes an image of size n − r × m − c, E (sx (I)) and E (sy (I)) are the cost of the respective seam removal operation.
We store a simple n × m 1-bit map which indicates which of the two options was chosen in each step of the dynamic programming、Choosing a left neighbor corresponds to a vertical seam removal while choosing the top neighbor corresponds to a horizontal seam removal、Given a target size n′ ×m′ where n′ = n−r and m′ = m−c, we backtrack from T(r, c) to T(0, 0) and apply the corresponding removal operations、Figure 7 shows an example of different retargeting strategies on an image.
其中In−r×m−c表示大小为n−r×m−c, E (sx (I))的图像和E (sy (I))分别为拆缝作业的成本。
我们存储了一个简单的n × m的1位映射,它表示在动态规划的每一步中选择了两个选项中的哪一个。选择左邻对应于垂直接缝的去除,而选择上邻对应于水平接缝的去除。给定目标大小n ’ ×m ',其中n ’ = n−r, m ’ = m−c,我们从T(r, c)回溯到T(0,0),并应用相应的移除操作。图7显示了在图像上使用不同的策略的例子。
Figure 6: Aspect ratio change of pictures of the Japanese master Utagawa Hiroshige、In both examples the original image is widened by seam insertion.
图6:日本大师宇川广重的图片纵横比变化。在这两个例子中,原始图像都是通过接缝插入来扩大的。
Figure 7: Optimal order retargeting: On the top is the original image and its transport map T、Given a target size, we follow the optimal path (white path on T) to obtain the retargeted image (top row, right)、For comparison we show retargeting results by alternating between horizontal and vertical seam removal (top row, left), removing vertical seams first (bottom row, left), and removing horizontal seams first (bottom row, right)
图7:最优顺序重定向:最上方为原图像及其传输图T。给定目标尺寸,我们沿着最优路径(T上的白色路径)得到重定向图像(最上方,右侧)。为了比较,我们显示了通过交替移动水平和垂直接缝(上排,左)、先移除垂直接缝(下排,左)和先移除水平接缝(下排,右)来实现再定位的结果。
4.3 Image Enlarging
The process of removing vertical and horizontal seams can be seen as a time-evolution process、We denote I(t) as the smaller image created after t seam have been removed from I、To enlarge an image we approximate an ‘inversion’ of this time evolution and insert new ‘artificial’ seams to the image、Hence, to enlarge the size of an image I by one we compute the optimal vertical (horizontal) seam s on I and duplicate the pixels of s by averaging them with their left and right neighbors (top and bottom in the horizontal case).
Using the time evolution notation, we denote the resulting image as I(−1)、Unfortunately, repeating this process will most likely create
a stretching artifact by choosing the same seam (Figure 8(b))、To achieve effective enlarging, it is important to balance between the original image content and the artificially inserted parts、Therefore, to enlarge an image by k, we find the first k seams for removal, and duplicate them in order to arrive at I(−k) (Figure 8©)、This can be viewed as the process of traversing back in time to recover pixels from a larger image that would have been removed by seam removals (although it is not guaranteed to be the case).
Duplicating all the seams in an image is equivalent to standard scaling (see Figure 8 (e))、To continue in content-aware fashion for excessive image enlarging (for instance, greater than 50%), we break the process into several steps、Each step does not enlarge the size of the image in more than a fraction of its size from the pre- vious step, essentially guarding the important content from being stretched、Nevertheless, extreme enlarging of an image would most probably produce noticeable artifacts (Figure 8 (f)).
4.3图像放大
拆除垂直和水平煤层的过程可以看作是一个时间演化的过程。我们将I(t)表示为t缝从I中移除后生成的较小图像。为了放大图像,我们近似地对这一时期的演变进行“反演”,并在图像中插入新的“人工”缝。因此,为了将图像I放大1倍,我们在I上计算最佳的垂直(水平)接缝s,并通过对s的左右相邻点(水平情况下的顶部和底部)平均来复制s的像素。
使用时间演化符号,我们将得到的图像表示为I(−1)。不幸的是,重复这个过程很可能会产生
通过选择相同的接缝形成拉伸工件(图8(b))。为了实现有效的放大,必须在原始图像内容和人工插入的部分之间取得平衡。因此,为了将图像放大k倍,我们找到前k个接缝,然后复制它们,得到I(−k)(图8©)。这可以看作是穿越时间,从更大的图像中恢复像素的过程,这些图像可能会被接缝移除(尽管不能保证是这样)。
复制图像中的所有接缝相当于标准缩放(见图8 (e))。为了继续以内容感知的方式处理过度的图像放大(例如,超过50%),我们将这个过程分成几个步骤。每一步都不会将图像的大小放大超过前一步的一部分,本质上是保护重要内容不被拉伸。然而,图像的极度放大很可能会产生明显的伪影(图8 (f))。
Figure 8: Seam insertion: finding and inserting the optimum seam on an enlarged image will most likely insert the same seam again and again as in (b)、Inserting the seams in order of removal © achieves the desired 50% enlargement (d)、Using two steps of seam insertions of 50% in (f) achieves better results than scaling (e)、In (g), a close view of the seams inserted to expand figure 6 is shown.
图8:接缝插入:查找和插入放大图像的最优接缝将最有可能插入相同的缝一次又一次的(b)。插入删除©的接缝,以达到所需的50%扩大(d)。使用两个步骤seam的插入(f)达到更好的结果比50%的比例(e)。(g),图6显示了插入到扩展的接缝的近景。
先考虑下沿着宽的方向进行缩放,缩放实质是删去了若干条纵向的像素“路径”(或者 seam,缝隙),直接缩放删去的路径都是竖直的长条,相当于沿着图像竖直方向做了均匀的降采样。那么我们为什么一定要删去竖直的“路径”呢,如果能保持删去路径后,剩余的图像部分还是“平滑”的,或者说删去的路径是最不重要的,就可以实现基于图像内容的缩放了,于是该论文作者提出了可以删去“能量”最少的 seam 来实现图像缩小。“能量” 如何定义,论文中给出如下的方式:e_1 (I)=|∂/∂x I|+|∂/∂y I| ,用像素在水平和竖直方向上的一阶梯度值的之和来表示该像素点的能量,那么一条缝隙的能量就是该缝隙上所有像素点能量之和。我们需要做的就是每次找到像素能量最小的一条缝隙,然后删去它。
3.2基本步骤 有了基本思想的铺垫,算法步骤也非常直观了,假设我们要删去 K 条 seam:
计算每个像素点的能量;
找到竖直/水平方向上的能量最小的路径,称为 seam;
移除 seam,得到新图像;
重复步骤 1 至步骤 3 K 次,得到缩放后的图像
B_energy = np.absolute(cv2.Scharr(B_image, -1, 1, 0)) + np.absolute(cv2.Scharr(B_image, -1, 0, 1))G_energy = np.absolute(cv2.Scharr(G_image, -1, 1, 0)) + np.absolute(cv2.Scharr(G_image, -1, 0, 1))R_energy = np.absolute(cv2.Scharr(R_image, -1, 1, 0)) + np.absolute(cv2.Scharr(R_image, -1, 0, 1))
3.3.2使用动态规划查找最优 seam 以竖直 seam 为例,这个问题可以看成图论里的最短路径问题,把每个像素点看成一个节点,像素 (i, j) 连通的边只有上一行的左、中、右和下一行的左、中、右像素,那么我们要找的就是从图像第一行像素出发到图像最后一行像素的最短路。
用经典的最短路算法来求解,然而这里可以用动态规划进行更高效的求解:设图像宽、高分别为 W,H,记 M[i][j] 为到 (i, j)像素点的最优 seam 的像素能量和,那么我们只要找到最后一行里能量最小的像素,即 min(M[H-1][j]),然后回溯即可以找到最优 seam。记像素点 (i, j) 的能量为 e[i][j],则能量转移公式为:
M[i][j] = e[i][j] + min(M[i-1][j-1], M[i-1][j], M[i-1][j+1])
还是以竖直情况为例,作者给出的第一种方法是先按类似方法找到一条最优 seam,然后将这条 seam 与左右相邻的 seam 平均,这样得到一条新 seam 并插入到原图。这种方法的问题在于每次插入新 seam 后,下次再找最优 seam 可能还是在前一次最优 seam 的附近,即我们利用的信息重复/冗余了, 假设我们要插入 k 条新 seam,那么先一次性找到 k 条最优 seam,然后按反向顺序逐一取左右 seam 平均插入到图像中即可:
4、实验环境 4.1 基本概要使用python,调用opencv库,使用pygame框架作为GUI平台
4.2 实验代码仅一个python程序main.py,运行前需将处理的图片命名为in.jpg并放置于和main.py同一文件夹下即可。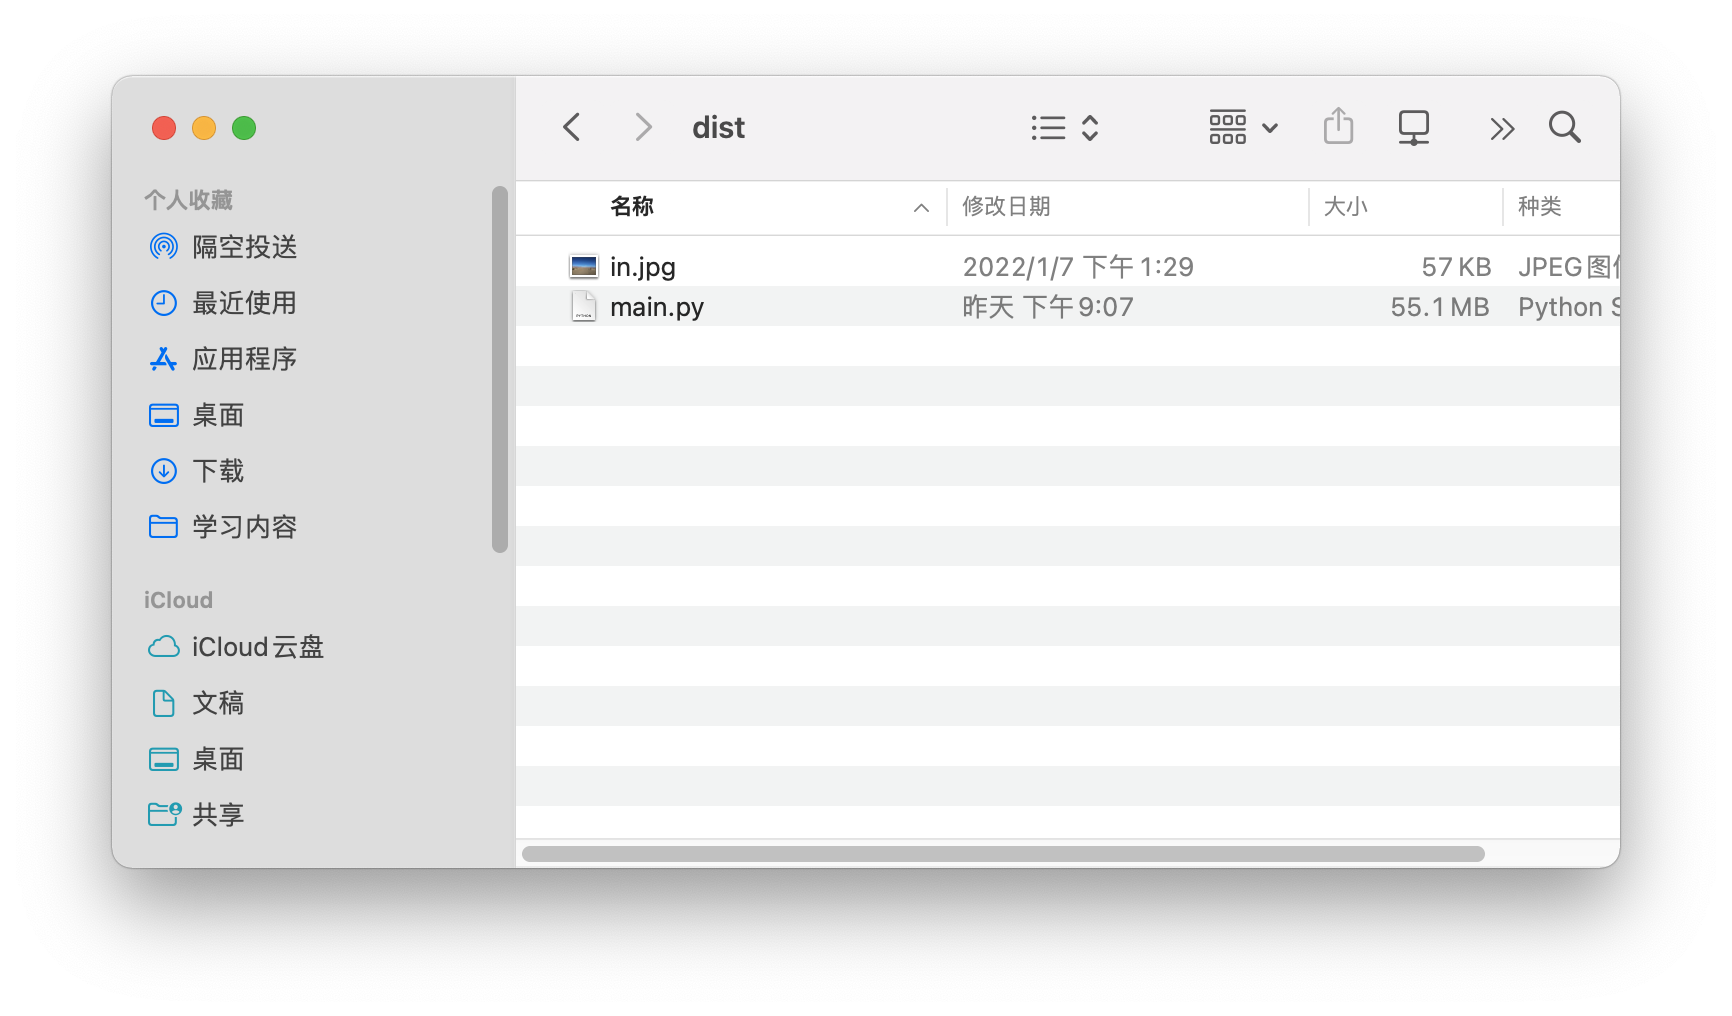
如图所示即可。
4.3 展示结果 打包生成了windows可直接可执行的exe文件,使用方法一致,需放置in.jpg与同一文件夹下:
站内下载地址
制作好的视频,在作业中已经附上,另附视频地址:bilibili地址
基于Seam Carving算法的图像放缩pygame程序
这个就是制作的GUI界面,直接在黑色框中输入想要得到的大小“450-600”即可,然后就会看到动画中动态显示整个删除的效果。
以下是视频中用到的图片:
这张是初始图片
这个是算法
这是直接缩放
可以看到,直接缩放的图中,人物已经发生变形。
初始图
这个是算法
这个是直接缩放
可以看到直接拉伸图片的图片中,船已经发生了变形,而使用算法的图片虽然已经改变大小但是船本身并没有发生显著变化。
import threadingimport pygameimport sysimport cv2import numpy as npimport timeclass TextBox: def __init__(self): self.width = 200 self.height = 30 self.x = 950 self.y = 100 self.text = "" # 文本框内容 self.__surface = pygame.Surface((self.width, self.height)) self.font = pygame.font.Font(None, 32) # 使用pygame自带字体 def draw_text(self, dest_surf): text_surf = self.font.render(self.text, True, (255, 255, 255)) dest_surf.blit(self.__surface, (self.x, self.y)) dest_surf.blit(text_surf, (self.x, self.y + (self.height - text_surf.get_height())), (0, 0, self.width, self.height)) def key_down(self, event): unicode = event.unicode key = event.key # 退位键 if key == 8: self.text = self.text[:-1] return if unicode != "": char = unicode else: char = chr(key) self.text += charclass Button(): def __init__(self, screen, msg): self.screen = screen self.width = 200 self.height = 50 self.button_color = (193, 210, 240) self.text_color = (0, 0, 0) self.font = pygame.font.Font(None, 36) self.rect = pygame.Rect(950, 200, self.width, self.height) self.msg_image = self.font.render(msg, True, self.text_color, self.button_color) self.msg_image_rect = (980, 210) def draw_button(self): self.screen.fill(self.button_color, self.rect) self.screen.blit(self.msg_image, self.msg_image_rect)class Label(): def __init__(self, w, h, screen, msg): self.screen = screen self.font = pygame.font.Font(None, 36) self.msg = msg self.obj = self.font.render(msg, True, (255, 10, 10)) self.rect = (w, h) def draw_text(self): self.screen.blit(self.obj, self.rect) def change_msg(self, msg): self.msg = msgdef calc(): in_image = cv2.imread("in.jpg").astype(np.float64) in_height, in_width = in_image.shape[: 2] global now_height global now_width global out_height global out_width global pic_state print("height:", in_height, " width:", in_width) kernel_x = np.array([[0., 0., 0.], [-1., 0., 1.], [0., 0., 0.]], dtype=np.float64) kernel_y_left = np.array([[0., 0., 0.], [0., 0., 1.], [0., -1., 0.]], dtype=np.float64) kernel_y_right = np.array([[0., 0., 0.], [1., 0., 0.], [0., -1., 0.]], dtype=np.float64) out_image = np.copy(in_image) delta_height = int(out_height - in_height) delta_width = int(out_width - in_width) # remove width if delta_width < 0: print("remove width") delta_width = -delta_width for num_pixel in range(delta_width): (B_image, G_image, R_image) = cv2.split(out_image) B_energy = np.absolute(cv2.Scharr(B_image, -1, 1, 0)) + np.absolute(cv2.Scharr(B_image, -1, 0, 1)) G_energy = np.absolute(cv2.Scharr(G_image, -1, 1, 0)) + np.absolute(cv2.Scharr(G_image, -1, 0, 1)) R_energy = np.absolute(cv2.Scharr(R_image, -1, 1, 0)) + np.absolute(cv2.Scharr(R_image, -1, 0, 1)) energy_map = B_energy + G_energy + R_energy now_height, now_width = energy_map.shape matrix_x = np.absolute(cv2.filter2D(B_image, -1, kernel=kernel_x)) + np.absolute(cv2.filter2D(G_image, -1, kernel=kernel_x)) + np.absolute(cv2.filter2D(R_image, -1, kernel=kernel_x)) matrix_y_left = np.absolute(cv2.filter2D(B_image, -1, kernel=kernel_y_left)) + np.absolute(cv2.filter2D(G_image, -1, kernel=kernel_y_left)) + np.absolute(cv2.filter2D(R_image, -1, kernel=kernel_y_left)) matrix_y_right = np.absolute(cv2.filter2D(B_image, -1, kernel=kernel_y_right)) + np.absolute(cv2.filter2D(G_image, -1, kernel=kernel_y_right)) + np.absolute(cv2.filter2D(R_image, -1, kernel=kernel_y_right)) cumulative_map = np.copy(energy_map) for row in range(1, now_height): for col in range(now_width): if col == 0: e_right = cumulative_map[row - 1, col + 1] + matrix_x[row - 1, col + 1] + matrix_y_right[ row - 1, col + 1] e_up = cumulative_map[row - 1, col] + matrix_x[row - 1, col] cumulative_map[row, col] = energy_map[row, col] + min(e_right, e_up) elif col == now_width - 1: e_left = cumulative_map[row - 1, col - 1] + matrix_x[row - 1, col - 1] + matrix_y_left[ row - 1, col - 1] e_up = cumulative_map[row - 1, col] + matrix_x[row - 1, col] cumulative_map[row, col] = energy_map[row, col] + min(e_left, e_up) else: e_left = cumulative_map[row - 1, col - 1] + matrix_x[row - 1, col - 1] + matrix_y_left[ row - 1, col - 1] e_right = cumulative_map[row - 1, col + 1] + matrix_x[row - 1, col + 1] + matrix_y_right[ row - 1, col + 1] e_up = cumulative_map[row - 1, col] + matrix_x[row - 1, col] cumulative_map[row, col] = energy_map[row, col] + min(e_left, e_right, e_up) seam_idx = np.zeros((now_height,), dtype=np.uint32) seam_idx[-1] = np.argmin(cumulative_map[-1]) for row in range(now_height - 2, -1, -1): prv_x = seam_idx[row + 1] if prv_x == 0: seam_idx[row] = np.argmin(cumulative_map[row, : 2]) else: seam_idx[row] = np.argmin( cumulative_map[row, prv_x - 1: min(prv_x + 2, now_width - 1)]) + prv_x - 1 show_tmp_image = np.copy(out_image) for row in range(now_height): col = seam_idx[row] show_tmp_image[row, col, 0] = 0 show_tmp_image[row, col, 1] = 0 show_tmp_image[row, col, 2] = 255 cv2.imwrite("tmp.jpg", show_tmp_image.astype(np.uint8)) pic_state = 1 output = np.zeros((now_height, now_width - 1, 3)) for row in range(now_height): col = seam_idx[row] output[row, :, 0] = np.delete(out_image[row, :, 0], [col]) output[row, :, 1] = np.delete(out_image[row, :, 1], [col]) output[row, :, 2] = np.delete(out_image[row, :, 2], [col]) out_image = output cv2.imwrite("out.jpg", out_image.astype(np.uint8)) # insert width elif delta_width > 0: print("insert width") seams_record = [] temp_image = np.copy(out_image) for num_pixel in range(delta_width): (B_image, G_image, R_image) = cv2.split(out_image) B_energy = np.absolute(cv2.Scharr(B_image, -1, 1, 0)) + np.absolute(cv2.Scharr(B_image, -1, 0, 1)) G_energy = np.absolute(cv2.Scharr(G_image, -1, 1, 0)) + np.absolute(cv2.Scharr(G_image, -1, 0, 1)) R_energy = np.absolute(cv2.Scharr(R_image, -1, 1, 0)) + np.absolute(cv2.Scharr(R_image, -1, 0, 1)) energy_map = B_energy + G_energy + R_energy now_height, now_width = energy_map.shape cumulative_map = np.copy(energy_map) for row in range(1, now_height): for col in range(now_width): cumulative_map[row, col] = energy_map[row, col] + np.amin( cumulative_map[row - 1, max(col - 1, 0): min(col + 2, now_width - 1)]) seam_idx = np.zeros((now_height,), dtype=np.uint32) seam_idx[-1] = np.argmin(cumulative_map[-1]) for row in range(now_height - 2, -1, -1): prv_x = seam_idx[row + 1] if prv_x == 0: seam_idx[row] = np.argmin(cumulative_map[row, : 2]) else: seam_idx[row] = np.argmin( cumulative_map[row, prv_x - 1: min(prv_x + 2, now_width - 1)]) + prv_x - 1 seams_record.append(seam_idx) show_tmp_image = np.copy(out_image) for row in range(now_height): col = seam_idx[row] show_tmp_image[row, col, 0] = 0 show_tmp_image[row, col, 1] = 0 show_tmp_image[row, col, 2] = 255 cv2.imwrite("tmp.jpg", show_tmp_image.astype(np.uint8)) pic_state = 1 output = np.zeros((now_height, now_width - 1, 3)) for row in range(now_height): col = seam_idx[row] output[row, :, 0] = np.delete(out_image[row, :, 0], [col]) output[row, :, 1] = np.delete(out_image[row, :, 1], [col]) output[row, :, 2] = np.delete(out_image[row, :, 2], [col]) out_image = output out_image = np.copy(temp_image) for num_pixel in range(len(seams_record)): seam = seams_record.pop(0) now_height, now_width = out_image.shape[: 2] output = np.zeros((now_height, now_width + 1, 3)) for row in range(now_height): col = seam[row] for ch in range(3): if col == 0: p = np.average(out_image[row, col: col + 2, ch]) output[row, col, ch] = out_image[row, col, ch] output[row, col + 1, ch] = p output[row, col + 1:, ch] = out_image[row, col:, ch] else: p = np.average(out_image[row, col - 1: col + 1, ch]) output[row, : col, ch] = out_image[row, : col, ch] output[row, col, ch] = p output[row, col + 1:, ch] = out_image[row, col:, ch] out_image = np.copy(output) new_seams_record = [] for this_seam in seams_record: this_seam[np.where(this_seam >= seam)] += 2 new_seams_record.append(this_seam) seams_record = new_seams_record cv2.imwrite("tmp.jpg", out_image.astype(np.uint8)) cv2.imwrite("out.jpg", out_image.astype(np.uint8)) else: print("not weight") if delta_height < 0: print("remove height") now_height, now_width, now_ch = out_image.shape trans_image = np.zeros((now_width, now_height, now_ch)) image_flip = np.fliplr(out_image) for c in range(now_ch): for row in range(now_height): trans_image[:, row, c] = image_flip[row, :, c] out_image = trans_image delta_height = -delta_height for num_pixel in range(delta_height): (B_image, G_image, R_image) = cv2.split(out_image) B_energy = np.absolute(cv2.Scharr(B_image, -1, 1, 0)) + np.absolute(cv2.Scharr(B_image, -1, 0, 1)) G_energy = np.absolute(cv2.Scharr(G_image, -1, 1, 0)) + np.absolute(cv2.Scharr(G_image, -1, 0, 1)) R_energy = np.absolute(cv2.Scharr(R_image, -1, 1, 0)) + np.absolute(cv2.Scharr(R_image, -1, 0, 1)) energy_map = B_energy + G_energy + R_energy trans_height, trans_width = energy_map.shape now_height = trans_width now_width = trans_height matrix_x = np.absolute(cv2.filter2D(B_image, -1, kernel=kernel_x)) + np.absolute(cv2.filter2D(G_image, -1, kernel=kernel_x)) + np.absolute(cv2.filter2D(R_image, -1, kernel=kernel_x)) matrix_y_left = np.absolute(cv2.filter2D(B_image, -1, kernel=kernel_y_left)) + np.absolute(cv2.filter2D(G_image, -1, kernel=kernel_y_left)) + np.absolute(cv2.filter2D(R_image, -1, kernel=kernel_y_left)) matrix_y_right = np.absolute(cv2.filter2D(B_image, -1, kernel=kernel_y_right)) + np.absolute(cv2.filter2D(G_image, -1, kernel=kernel_y_right)) + np.absolute(cv2.filter2D(R_image, -1, kernel=kernel_y_right)) cumulative_map = np.copy(energy_map) for row in range(1, trans_height): for col in range(trans_width): if col == 0: e_right = cumulative_map[row - 1, col + 1] + matrix_x[row - 1, col + 1] + matrix_y_right[ row - 1, col + 1] e_up = cumulative_map[row - 1, col] + matrix_x[row - 1, col] cumulative_map[row, col] = energy_map[row, col] + min(e_right, e_up) elif col == trans_width - 1: e_left = cumulative_map[row - 1, col - 1] + matrix_x[row - 1, col - 1] + matrix_y_left[ row - 1, col - 1] e_up = cumulative_map[row - 1, col] + matrix_x[row - 1, col] cumulative_map[row, col] = energy_map[row, col] + min(e_left, e_up) else: e_left = cumulative_map[row - 1, col - 1] + matrix_x[row - 1, col - 1] + matrix_y_left[ row - 1, col - 1] e_right = cumulative_map[row - 1, col + 1] + matrix_x[row - 1, col + 1] + matrix_y_right[ row - 1, col + 1] e_up = cumulative_map[row - 1, col] + matrix_x[row - 1, col] cumulative_map[row, col] = energy_map[row, col] + min(e_left, e_right, e_up) seam_idx = np.zeros((trans_height,), dtype=np.uint32) seam_idx[-1] = np.argmin(cumulative_map[-1]) for row in range(trans_height - 2, -1, -1): prv_x = seam_idx[row + 1] if prv_x == 0: seam_idx[row] = np.argmin(cumulative_map[row, : 2]) else: seam_idx[row] = np.argmin( cumulative_map[row, prv_x - 1: min(prv_x + 2, trans_width - 1)]) + prv_x - 1 show_tmp_image = np.copy(out_image) for row in range(trans_height): col = seam_idx[row] show_tmp_image[row, col, 0] = 0 show_tmp_image[row, col, 1] = 0 show_tmp_image[row, col, 2] = 255 trans_image = np.zeros((trans_width, trans_height, now_ch)) for c in range(now_ch): for row in range(trans_height): trans_image[:, trans_height - 1 - row, c] = show_tmp_image[row, :, c] cv2.imwrite("tmp.jpg", trans_image.astype(np.uint8)) pic_state = 1 output = np.zeros((trans_height, trans_width - 1, 3)) for row in range(trans_height): col = seam_idx[row] output[row, :, 0] = np.delete(out_image[row, :, 0], [col]) output[row, :, 1] = np.delete(out_image[row, :, 1], [col]) output[row, :, 2] = np.delete(out_image[row, :, 2], [col]) out_image = output trans_height, trans_width, trans_ch = out_image.shape trans_image = np.zeros((trans_width, trans_height, trans_ch)) for c in range(trans_ch): for row in range(trans_height): trans_image[:, trans_height - 1 - row, c] = out_image[row, :, c] out_image = trans_image cv2.imwrite("out.jpg", out_image.astype(np.uint8)) elif delta_height > 0: print("insert height") seams_record = [] now_height, now_width, now_ch = out_image.shape trans_image = np.zeros((now_width, now_height, now_ch)) image_flip = np.fliplr(out_image) for c in range(now_ch): for row in range(now_height): trans_image[:, row, c] = image_flip[row, :, c] out_image = trans_image temp_image = np.copy(out_image) for num_pixel in range(delta_height): (B_image, G_image, R_image) = cv2.split(out_image) B_energy = np.absolute(cv2.Scharr(B_image, -1, 1, 0)) + np.absolute(cv2.Scharr(B_image, -1, 0, 1)) G_energy = np.absolute(cv2.Scharr(G_image, -1, 1, 0)) + np.absolute(cv2.Scharr(G_image, -1, 0, 1)) R_energy = np.absolute(cv2.Scharr(R_image, -1, 1, 0)) + np.absolute(cv2.Scharr(R_image, -1, 0, 1)) energy_map = B_energy + G_energy + R_energy trans_height, trans_width = energy_map.shape now_height = trans_width now_width = trans_height cumulative_map = np.copy(energy_map) for row in range(1, trans_height): for col in range(trans_width): cumulative_map[row, col] = energy_map[row, col] + np.amin( cumulative_map[row - 1, max(col - 1, 0): min(col + 2, trans_width - 1)]) seam_idx = np.zeros((trans_height,), dtype=np.uint32) seam_idx[-1] = np.argmin(cumulative_map[-1]) for row in range(trans_height - 2, -1, -1): prv_x = seam_idx[row + 1] if prv_x == 0: seam_idx[row] = np.argmin(cumulative_map[row, : 2]) else: seam_idx[row] = np.argmin( cumulative_map[row, prv_x - 1: min(prv_x + 2, trans_width - 1)]) + prv_x - 1 seams_record.append(seam_idx) show_tmp_image = np.copy(out_image) for row in range(trans_height): col = seam_idx[row] show_tmp_image[row, col, 0] = 0 show_tmp_image[row, col, 1] = 0 show_tmp_image[row, col, 2] = 255 trans_image = np.zeros((trans_width, trans_height, now_ch)) for c in range(now_ch): for row in range(trans_height): trans_image[:, trans_height - 1 - row, c] = show_tmp_image[row, :, c] cv2.imwrite("tmp.jpg", trans_image.astype(np.uint8)) pic_state = 1 output = np.zeros((trans_height, trans_width - 1, 3)) for row in range(trans_height): col = seam_idx[row] output[row, :, 0] = np.delete(out_image[row, :, 0], [col]) output[row, :, 1] = np.delete(out_image[row, :, 1], [col]) output[row, :, 2] = np.delete(out_image[row, :, 2], [col]) out_image = output out_image = np.copy(temp_image) for num_pixel in range(len(seams_record)): seam = seams_record.pop(0) trans_height, trans_width = out_image.shape[: 2] output = np.zeros((trans_height, trans_width + 1, 3)) for row in range(trans_height): col = seam[row] for ch in range(3): if col == 0: p = np.average(out_image[row, col: col + 2, ch]) output[row, col, ch] = out_image[row, col, ch] output[row, col + 1, ch] = p output[row, col + 1:, ch] = out_image[row, col:, ch] else: p = np.average(out_image[row, col - 1: col + 1, ch]) output[row, : col, ch] = out_image[row, : col, ch] output[row, col, ch] = p output[row, col + 1:, ch] = out_image[row, col:, ch] out_image = np.copy(output) new_seams_record = [] for this_seam in seams_record: this_seam[np.where(this_seam >= seam)] += 2 new_seams_record.append(this_seam) seams_record = new_seams_record trans_height, trans_width, trans_ch = out_image.shape trans_image = np.zeros((trans_width, trans_height, now_ch)) for c in range(now_ch): for row in range(trans_height): trans_image[:, trans_height - 1 - row, c] = out_image[row, :, c] cv2.imwrite("tmp.jpg", trans_image.astype(np.uint8)) pic_state = 1 trans_height, trans_width, trans_ch = out_image.shape trans_image = np.zeros((trans_width, trans_height, trans_ch)) for c in range(trans_ch): for row in range(trans_height): trans_image[:, trans_height - 1 - row, c] = out_image[row, :, c] out_image = trans_image cv2.imwrite("out.jpg", out_image.astype(np.uint8))def main(): pygame.init() screen = pygame.display.set_mode((1200, 800)) screen.fill((255, 255, 255)) pygame.display.set_caption("处理图像") fps = 2 fclock = pygame.time.Clock() global out_height global out_width global now_height global now_width text_box = TextBox() text_box.draw_text(screen) button = Button(screen, "start resize") button.draw_button() pic = pygame.image.load("in.jpg") out_height = pic.get_size()[1] out_width = pic.get_size()[0] now_height = pic.get_size()[1] now_width = pic.get_size()[0] screen.blit(pic, (5, 5)) label_raw = Label(920, 20, screen, "raw size: " + str(pic.get_size()[1]) + "-" + str(pic.get_size()[0])) label_raw.draw_text() label_label_one = Label(920, 45, screen, "please input new size") label_label_thr = Label(950, 45, screen, "please wait") label_label_one.draw_text() label_label_two = Label(950, 70, screen, "width-height") label_label_two.draw_text() thread_state = 0 # 0准备 1运行 2死亡 global pic_state t = threading.Thread(target=calc) t.setDaemon(True) while True: for event in pygame.event.get(): if event.type == pygame.QUIT: pygame.quit() sys.exit() elif event.type == pygame.KEYDOWN: text_box.key_down(event) elif event.type == pygame.MOUSEBUTTONDOWN: mouse_x, mouse_y = pygame.mouse.get_pos() if button.rect.collidepoint(mouse_x, mouse_y) and thread_state == 0: new_size = text_box.text.split('-') if len(new_size) == 1: break out_height = int(new_size[0]) out_width = int(new_size[1]) thread_state = 1 t.start() if button.rect.collidepoint(mouse_x, mouse_y) and thread_state == 2: thread_state = 0 pic_state = 0 t = threading.Thread(target=calc) if thread_state == 1: screen.fill((255, 255, 255)) if not t.is_alive(): thread_state = 2 if pic_state == 0: pic = pygame.image.load("in.jpg") screen.blit(pic, (5, 5)) label_label_thr.draw_text() label_label_for = Label(930, 110, screen, "output:" + str(out_height) + '-' + str(out_width)) label_label_for.draw_text() label_label_fv = Label(950, 210, screen, "now:" + str(now_height) + '-' + str(now_width)) label_label_fv.draw_text() label_raw.draw_text() pygame.display.update() else: try: pic = pygame.image.load("tmp.jpg") except: continue else: screen.blit(pic, (5, 5)) fclock.tick(fps) label_label_thr.draw_text() label_label_for = Label(930, 110, screen, "output:" + str(out_height) + '-' + str(out_width)) label_label_for.draw_text() label_label_fv = Label(950, 210, screen, "now:" + str(now_height) + '-' + str(now_width)) label_label_fv.draw_text() label_raw.draw_text() pygame.display.update() elif thread_state == 0: screen.fill((255, 255, 255)) pic = pygame.image.load("in.jpg") screen.blit(pic, (5, 5)) label_raw = Label(920, 20, screen, "raw size: " + str(pic.get_size()[1]) + "-" + str(pic.get_size()[0])) label_raw.draw_text() label_label_one = Label(920, 45, screen, "please input new size") label_label_one.draw_text() label_label_two = Label(950, 70, screen, "width-height") label_label_two.draw_text() button.draw_button() text_box.draw_text(screen) label_raw.draw_text() pygame.display.update() elif thread_state == 2: screen.fill((255, 255, 255)) button_two = Button(screen, "again!") button_two.draw_button() label_label_over = Label(930, 110, screen, "over:" + str(out_height) + '-' + str(out_width)) label_label_over.draw_text() pic = pygame.image.load("out.jpg") screen.blit(pic, (5, 5)) pygame.display.update()if __name__ == '__main__': out_height = 0 out_width = 0 now_height = 0 now_width = 0 pic_state = 0 main()
Github地址Github地址
bilibili地址bilibili地址
项目成果展示地址站内地址·可执行文件